The Proposition
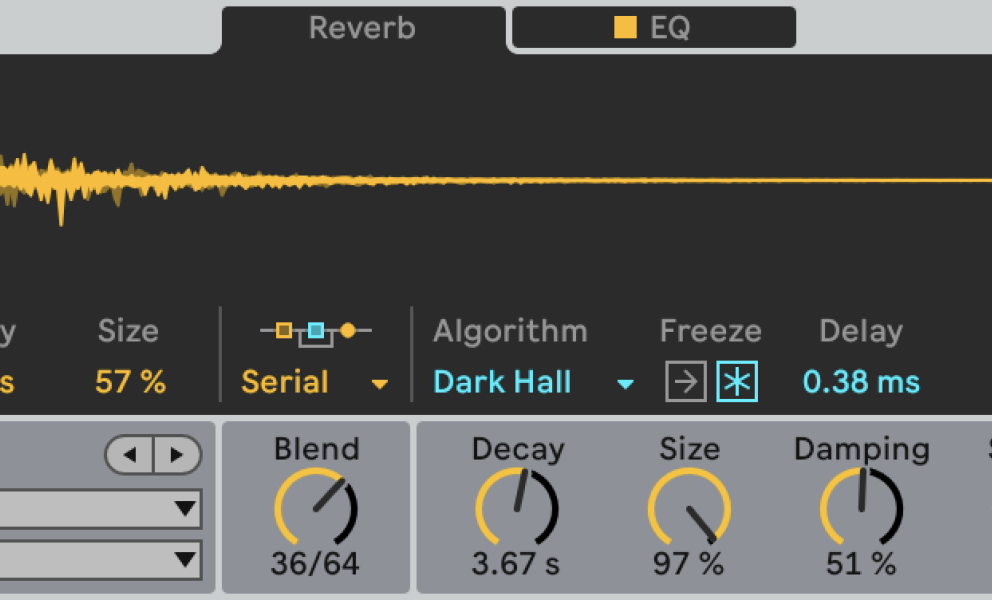
When working with a multichannel speaker setup, you can achieve amazing perceptions of space by using slightly differently adjusted reverb and delay effects. In the live set displayed, I use three instances of the Hybrid Reverb and two instances of the PitchLoop89 device for an 8-channel speaker setup. The set is a version of one I made for the theater play “Phädra in Flammen” which premiered on 7 October 2023 at the Akademietheater in Vienna, Austria.
In principle, such use of reverbs and delays (with or without pitch-shifting) works great when you have an immersive surround sound setting. In my opinion, the fulfilling experience of surround sound music lies in the complementary concurrence of audio signals coming from the sound sources around me rather than ostentatious movements of single musical elements.
Organizing a Multichannel Live Set
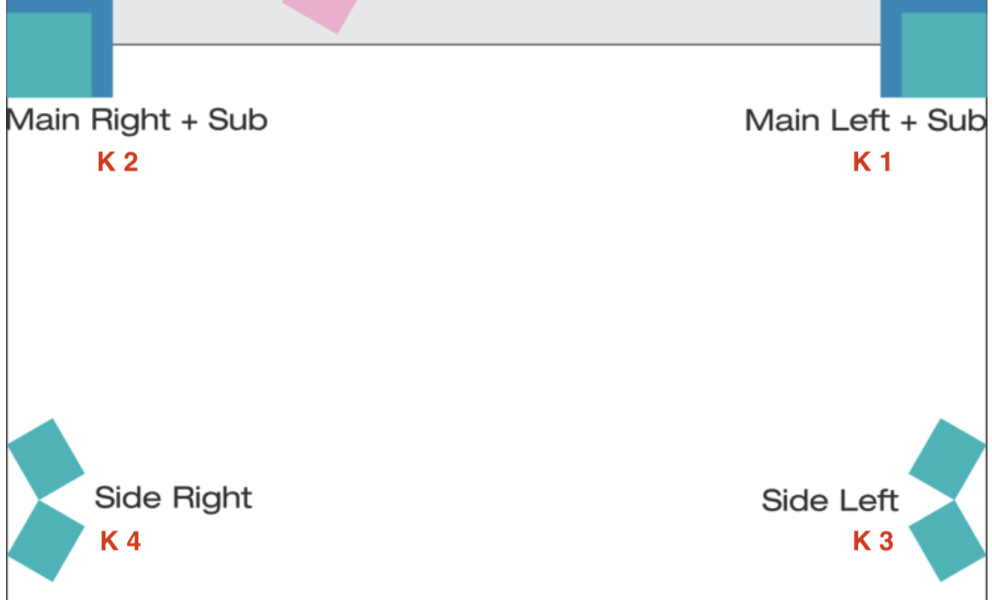
To feed the speakers with discrete signals, I use several helper tracks in my live set. I manage the different speakers as pairs, like the left and right channel of a stereo signal. Here is a schematic view of a typical surround sound speaker setup for eight channels taken from the technical rider of my latest AV concert:
Usually, the main speakers of the PA are fed with channels 1&2 (K1 and K2 in the picture), and channels 3-8 are additional speakers placed around the entire space (K3 to K8 in the picture). For the subs, I either use a crossover from the PA/FOH that is fed from all channels, or I use additional outputs from my audio interface and do the crossover myself. As you can see in the image, I want all my left signals on my left side when I look from the stage to the audience, including the monitor signals. The same goes for the right channels accordingly. When I play on a frontal stage, I love to place two speakers relatively near to the wall behind me and closer to each other than the other pairs of speakers to add a more focused and centralized sound source (K7 and K8 above).
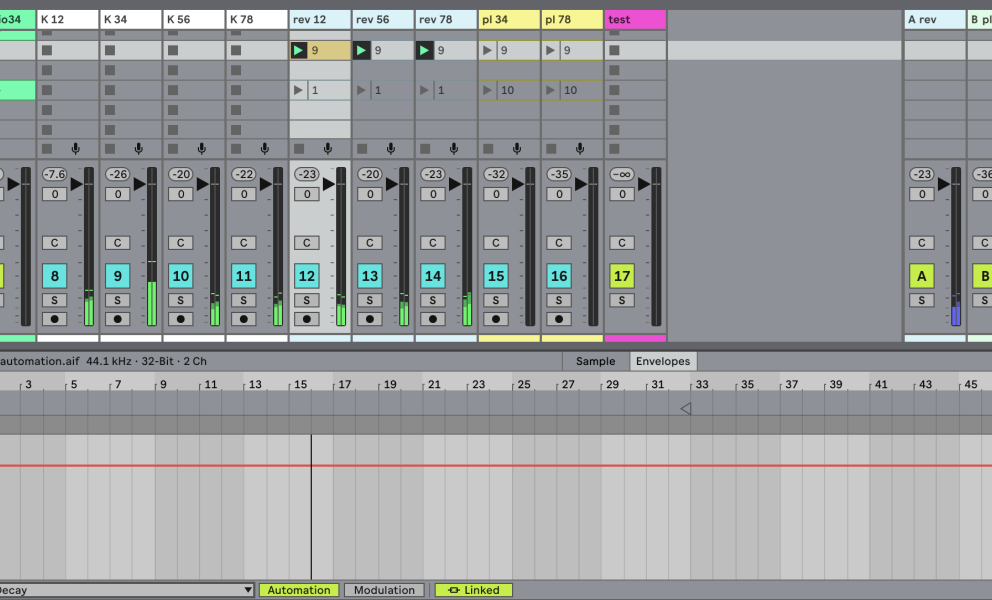
To collect the signals that should go to the different outputs of my audio interface, I first create four audio tracks that I name K12 (output 1&2), K34 (output 3&4), K56 (output 5&6), and K78 (output 7&8). I then set the Monitoring chooser of these helper tracks to Input. To send audio from Live’s other tracks to the output channels, I use a modification of the Max for Live Surround Panner which is routed to the K12-K78 helper tracks. For practical reasons, I set the Output Type for each track that contains my audio and MIDI clips to Sends Only because the routing of the audio is achieved with the Surround Panner device.
Organizing Immersive Effects
The next step is to organize the Sends and Returns for the immersive effects. Typically, these are reverb or delay effects. In multichannel setups, it is possible to achieve a particularly interesting perception of space when sending the same signal into multiple instances of an effect that are routed to different outputs. To achieve this, I need some more helper tracks that are all fed from one return track. Like with the output tracks K12-K78, I created three reverb tracks that are all fed from Send/Return A. In the example set, I chose to send three similar, just slightly different reverbs to the main speakers (channels 1&2), to the back of the room (channels 5&6), and to the two speakers in the very front (channels 7&8).
The parameter settings differ only slightly: here, just Size, Damping, Shape, and Modulation are different. Feel free to do as your ears tell you! Ideally, you experiment on-site with different settings to hear how the effects sound together in a specific space. If you use Live’s native Reverb device, just try altering Chorus and Early Reflections a bit and you’ll get nice, oftentimes slightly psychedelic results.
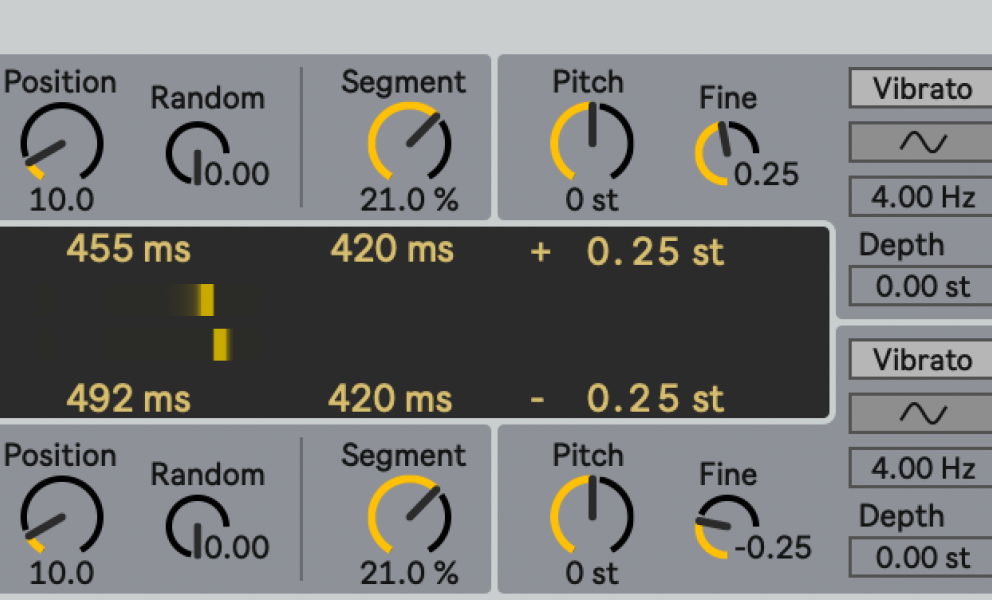
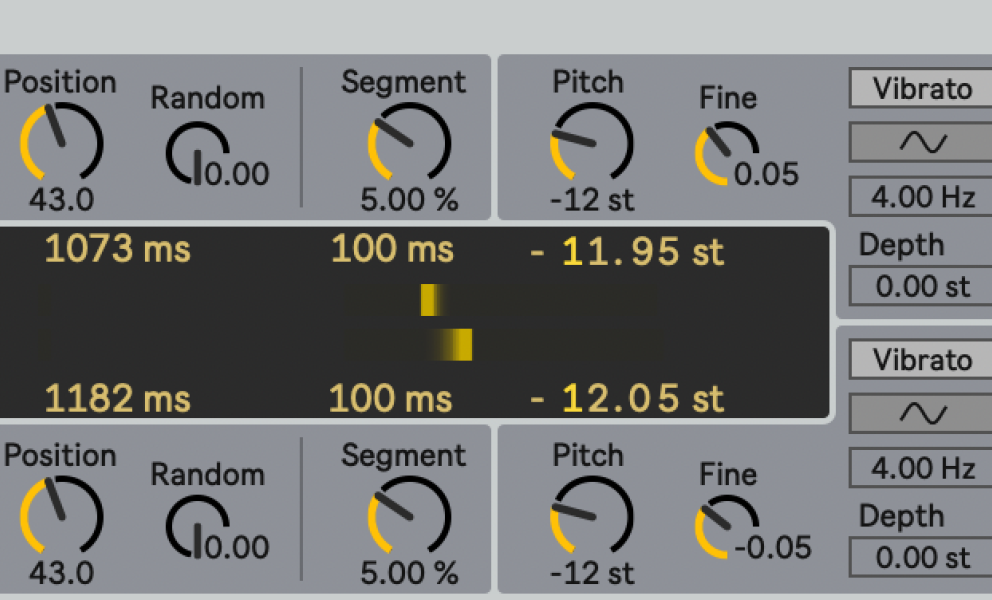
Another effect that I love to use in multichannel live sets is Robert Henke’s PitchLoop89 Max for Live device that is included in the Ableton Live Suite. As its name suggests, it is a pitch-shifting and looping device that is inspired by the Publison DHM 89, a French digital effect unit from 1978. The device has a lovely “organic” character that comes from several subtle modulations, randomization, and routing options. Using two of them for different outputs multiplies the incoming signal in interesting ways and can, with the right settings, even produce harmonic choruses that add another dimension to your sound. In this example set, I route the two PitchLoop89 devices to channels 3&4 and 7&8 respectively, assuming that the dry signal that is sent to return C and feeds both devices is likely to be played back mostly through the main speakers (channels 1&2).
The most noticeable difference between the settings is the Pitch setting for channel 7&8, but also the playback Position and the Segment length as well as the Position Modulation are different so that different parts of the audio signal are looped and played back through the additional speakers.
Automating Effect Returns
In Ableton Live’s Session View, it is not possible to add automation in return tracks. Occasionally, it can be very useful to make sure that effects evolve in a certain manner over time or to make sure they go back to their default settings at a particular point during a live performance. The only way to achieve this is by using the already established helper tracks. There it is possible to add clips that contain the desired automation. Since the effect helper tracks’ Monitoring is set to Input because they all are fed from Return tracks, the audio clips inserted appear greyed out. Don’t worry, they still do their job!
For automation purposes, I once created an almost empty audio clip by consolidating a very short sample (e.g. a click) with silence over a bar, put the clip’s Gain to -∞ dB, and saved its settings as default. Fortunately, even though the clip’s length is only one bar, you are still completely flexible in terms of length if you need a longer automation curve. Just set the clip’s end to the desired length. You can, of course, loop the clip if necessary. Otherwise, I recommend not to loop it to avoid distracting lights from the Clip Launch Button.
Below is an example of a longer reverb automation for over 59 bars. The aim was to make the reverb longer, freeze for some time, and then slowly fade out to extend a much too short recording of one of the actor’s humming in scene 9 of the play. I made different automations for each Hybrid Reverb so that the humming disappears from the back of the room to the front.
After that humming part, the reverbs must be set back to their initial settings. This is the purpose of the automation clips numbered “1”. Once scene 10 is triggered, the decay and all other settings go back to where they should be by default.
The Channel Test
The magenta colored “test” track in my live set is one of my most practical setup tools. It contains an audio loop of a person counting from one to eight. The Surround Panner is automated in a way that each number should only come out from the according channel’s loudspeaker. This helps me a great deal to make sure signals are routed the intended way. I can highly recommend implementing something like this!
Conclusion
Playing multichannel concerts is great fun but needs more technical planning and organization. Using spatialized effects adds dimension to the music and can be very rewarding. Trust your ears, test on-site, and think about listeners who can’t sit or stand in the sweet spot. The music should still translate for most of the audience.
Electric Indigo
Electric Indigo, DJ, composer, and musician who represents an intelligent and distinguished interpretation of techno and electronic music. In 1998 she founded the transnational female:pressure network. The Republic of Austria awarded her with the Kunstpreis Musik in 2020. Electric Indigo premiered her compositions at festivals like Wien Modern, ORF musikprotokoll, CTM, or Heroines of Sound and composed for Klangforum Wien. Her debut album “5 1 1 5 9 3” came out on Imbalance Computer Music, followed by "Ferrum" on Editions Mego in 2020. “Brittle” was released on Ventil Records in 2022.
Article topics
Article translations are machine translated and proofread.
Artikel von Electric Indigo
 Electric Indigo
